 Colin
Updated :
Colin
Updated :
Macros offers a simple way to control multiple parameters with a single knob. It is especially useful for drastically modifying a sound during a live performance. Instruments available on the Sound Store usually have several macros configured: you can learn useful parameter combinations by exploring them.
Quick links :
- How to control several parameters with one Macro knob
1. Overview
To open the Macros panel, tap the following icon from the left toolbar:
![]()
The Macros panel is visible until this button is pressed again. There are up to 16 macro controls available. You can switch between the display of macro knobs 1 to 8 and 9 to 16 by pressing their corresponding button:
![]()
Macros can also be displayed as an X/Y touch controller for a more convenient performance use: the horizontal axis controls one macro and the vertical axis another. They are arranged into pairs (first controller controls Macros 1 and 2, the second Macros 3-4, and so on). Press the corresponding “X/Y” button at the bottom of the panel to change the display:

2. How to control several parameters with one Macro knob
Most parameters available within BeatMaker can be assigned to a Macro knob, including:
- Editor, sampler and modulation parameters
- Plugins parameters (by using the “Show AU Knobs” mode from the plugin view)
- Mixer controls
- Any effect parameter
When you see a parameter you would like to assign to a Macro, simply double-tap on its knob control. A menu similar to this one appears:
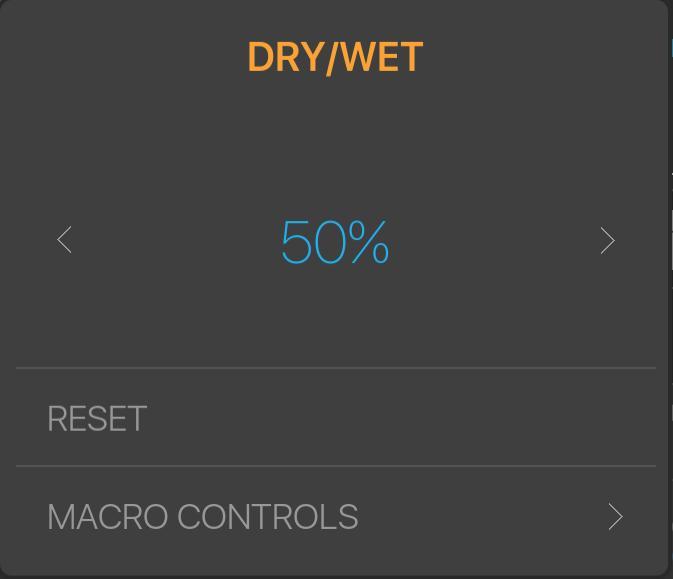
Press the “MACRO CONTROLS” item from the menu to display the macros list, then press the macro control you’d like to assign the parameter to:
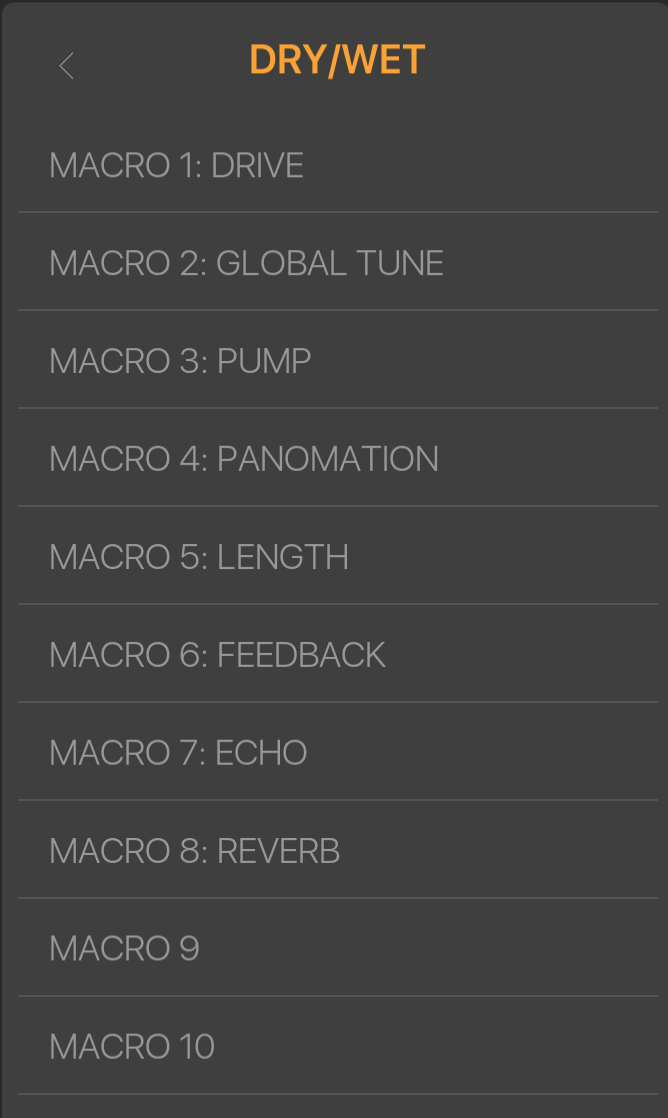
The text displayed next to a macro name is the first parameter that was assigned to it.
You can repeat the same procedure for any number of parameters and assign them to one or several macro controls. Assigned parameters are now turned into Macro controls themselves: changing their value has the same effect as moving their respective macro control from the Macros panel.
To remove a parameter from a Macro knob, double-tap on the parameter and choose “UNBIND MACRO” from the menu.
3. Editing existing Macro controls
By default, a macro controls the full value of a parameter (for example, from 0% to 100%). You can restrict the control range of each parameter by tapping the 3-dots button next to the macro knob:

The macro editor panel is displayed:

This panel contains a list of all assigned parameters for this particular macro. For each one, you can configure the control range by moving the “MIN” and “MAX” knobs to the desired position: the macro control will never set this parameter to a smaller (MIN) or greater (MAX) value.
Press the X icon next to any parameter to unbind it from the Macro control.
Comments